Monday, July 21, 2014

Slow Bake Asparagus and Shallots w/ Rosemary and Lemon Basil Salmon


I know what you're all thinking. You're thinking that you need a shallot and asparagus recipe that you can combine with a salmon recipe that you can cook all at the same time, on the same baking sheet! It's here friend. Let me revolutionize the way you cook asparagus and salmon together. Introducing my Slow Bake Asparagus and Shallots w/ Rosemary and Lemon Basil Salmon! 


Image 2A
Ingredients

1/2 bunch of asparagus
1 large shallot
2-4 cloves of garlic (How much garlic do you like?)
1 tablespoon of fresh rosemary
Salt (to taste)
Pepper (to taste)
2-3 tablespoons of lemon juice
2 tablespoons of fresh basil
? olive oil
12 oz salmon fillet


Instructions for experienced cook:

See Image 2A above: Replicate. Cooking Temp: 275° Cooking Time: 21-23 min. 

Instructions for inexperienced cook:

Image 2B
Preheat oven to 275°. Place your baking sheet on your counter top. Take out your roll of aluminum foil and unroll it to approx. 2 inches longer than your baking sheet. You likely won't have to worry about the vertical size. Rip off sheet of aluminum foil. Place the foil on the baking sheet. Place your left hand securely in the middle of the foil pinning it down to the middle of the baking sheet. Use your right index and middle fingers to press foil down around the inner perimeter of the baking sheet to line the inside. This will create a "pool" for extra oil and juices that will be easy to contain and clean when you're finished. Take your bunch of asparagus and remove the rubber band from around the circumference of them. Some people take this opportunity to run them under cold water to "clean" them. Once they're clean shake them about a bit over your sink to get the loose water droplets off. Hold the asparagus loosely and pat the blunt side of them gently against your counter top. To even out the bunch. Now lay them out on a safe cutting surface. I use a cutting board. Once they're laid out you can cut the ends off the bottom of them all simultaneously (See Image 2B for example). Now that your asparagus is ready place them on the left side of your baking sheet. (See Image 2A for example). Locate your shallot. Cut off both ends and remove the outer layer. Slice your shallot into pieces roughly 4-5mm wide. Scatter shallot pieces generously across the top of your asparagus which are now where? That's right, on your baking sheet! Drizzle olive oil over the top of your shallots and asparagus. Use your judgement. You don't want your shallots and asparagus to be "soaked" with olive oil, though you also don't want them to be dry. If you feel this is a fickle distinction then you can pour some olive oil into a small bowl and using a brush simply paint a healthy amount of oil over the shallots and asparagus. Add salt and pepper (to taste). Locate your cloves of garlic. Cut the end off and skin 1-3 cloves. Mince your garlic cloves, or as I prefer you can use a garlic press. Take the sum of your garlic efforts and spread them over your asparagus. Take your rosemary and hold it by the top of the stem above your cutting surface with your thumb and your forefinger. Use the same fingers on your other hand to strip the stem of the needles in a downward motion. Collect the stems into a pile on your cutting surface and chop them into small pieces. Sprinkle them over the top of your shallots and asparagus. Now you're ready for your salmon. You're going to be reusing a lot of the techniques we just discussed for the asparagus on your salmon so this part should go fast. Remove from package and place salmon skin side down on the right hand side of your baking sheet (See Image 2A for example). "Paint" olive oil over the top of your salmon using your brush. Add salt and pepper (to taste). Chop up your basil and sprinkle over your salmon. Take 1/2 of a lemon and squeeze roughly 2 tablespoons of juice onto your salmon. If you would like you can follow the previous garlic step and add some garlic as well. Make sure everything is evenly distributed throughout the landscape of your salmon. By this time your oven should be heated to the desired 275°. Open the door to your oven and place tray inside. Close door, and set timer for 21 minutes. Cook your salmon until it's opaque in the center. If you have a thermometer that should be about 135°. It may take a little longer than 21 minutes. Use a fork to check the density of your asparagus when you're checking your salmon. When finished, let rest for a minute or two, plate it, and enjoy!


Tuesday, June 10, 2014

Some kind of Steak w/ Red Potatoes that appear to be cooked, Asparagus and Shallots with what looks to be a Mustard Sauce and Prosciutto or some other kind of cured meat

Doesn't that look good?


I realized I hadn't made a blog post in quite some time. So I began going through my Asparagus archives and I found this picture. I don't really even remember making this. Those are our plates though. And it is clearly something I would make. It has all of the things I like: Asparagus, shallots, steak, cured pork. Now I don't want you to get the impression I just haphazardly throw together Asparagus recipes. A lot of thought, time, consideration, and sometimes even compromise go into each recipe. I'm not over exaggerating in the slightest. I typically keep rigorous and extensive notes on each recipe so I can either reproduce what I've done, or make subtle changes to make the recipe better. Some asparagus incarnations go through as many as 12-15 attempts before I deem them worthy of this blog. That being said, I began looking for my notes for this recipe and subsequent photo shoot. To no avail. I'm not sure if I should be exposing this much of my method to my readers but generally my notes get hand written on paper and then transposed to a word document and saved in the archives on my computer. As I have the handwriting of a dyslexic 4th grader the transfer from the written document to the word document is usually the most arduous task of the entire process. This time however I could not find any notes on my hard drive. I can only attribute this to one thing. I must have had 3 glasses of wine, and titled the document something really clever. So clever that at the time I was absolutely positive I would never forget what it was. What I'm getting at is that this recipe may be lost forever. Or at least until I start trying to figure out what I did. I think for now we should just appreciate the picture and leave it at that. If there were some kind of a public outcry I would have no hesitation in beginning the resurrection process, but seeing as I have little to no initiative and only 3 readers come here per day, and I sincerely doubt any of them have even made it this far into the paragraph we will just have to come to terms with the notion that this recipe may be lost forever.


Here it is smaller.


Tuesday, May 21, 2013

Pasta Amatriciana w/ Shallots and Asparagus on the side

This is my first guest post. It's from one of the best cooks I've met. I consider it a true honor that not only would she want to cook with shallots and asparagus, but she would want to guest post on my meager blog.

http://glutenfreegourmand.blogspot.com/2013/05/pasta-amatriciana.html

 
If you've never tried guanciale, you should check it out.  It's like bacon, only better.  Made from the jowl of the pig, guanciale is the best part of the animal once it's cured.


Guanciale is the central umame flavor in Pasta Amatriciana, a rustic pasta dish from Italy.  It's simple to make and, thanks to the guanciale, it's incredibly delicious.
If you use the concept of prepping and cooking at the same time, this simple dish is very quick to make.

Pasta Amatriciana Recipe

Prep/Cook time: 30 minutes
Serves 2-3

Set your water to boil for the pasta and, at the same time, put a large pan on the stove to heat up on medium heat.  Toss in the pan:
some lardons of guanciale
While all that is heating up, cut up some:
shallots
Toss those in the pan with the guanciale that's rendering.   Cut into chunks:

1 pound fresh or frozen tomatoes

By this time the water should be at a boil.  When this is indeed the case, start cooking:
8 oz. pasta 
Add the tomatoes to the pan with the shallots.  Add:
salt to taste
Boil down the tomatoes to thicken the sauce.  In the meantime, grate:
parmigiano reggiano to taste

When the pasta is al dente, scoop out some of the starchy pasta water and set aside.  Drain and rinse the pasta.  If the sauce needs some extra moisture, add some of the pasta water you reserved and stir in.  
Turn the heat off under your pan.  Add the pasta to the sauce.  Stir it all together to incorporate.  If more liquid is needed, add some of that pasta water you reserved.  Add most of the parmesan cheese you grated and stir that in, too.  Plate your pasta and serve hot.

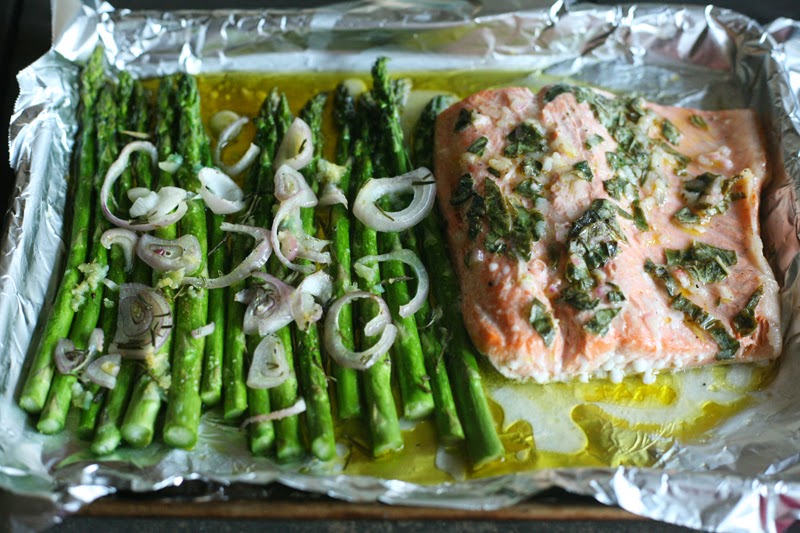
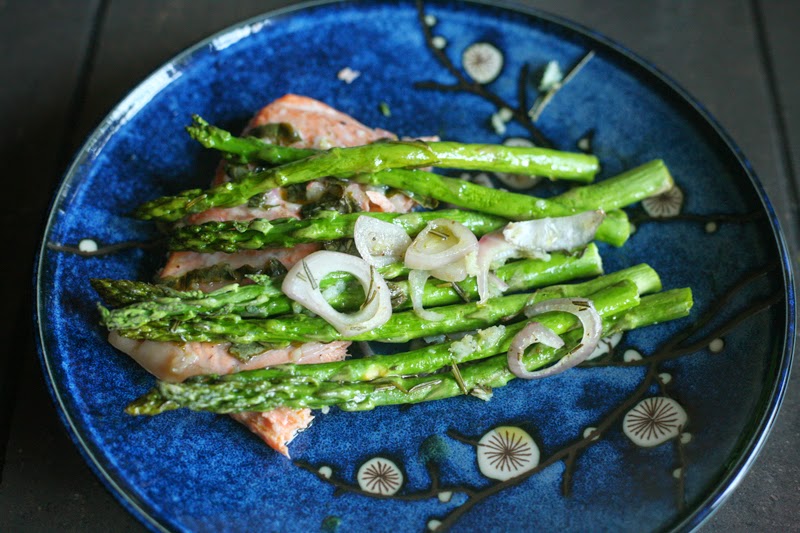
For some tips on how to cook an asparagus side for this recipe, visit Just Another Shallot and Asparagus Blog for the recipe!
 After you've plated your pasta, turn the heat back on to medium high in the large pan with the sauce.  Cut off the ends and toss into the pan:

1/4 pound asparagus

Sautee the asparagus for 2-3 minutes, coating the stalks with any extra sauce from the pan. When the asparagus starts to get tender, turn off the heat and serve the asparagus onto the plates with the pasta.
 
Enjoy!

Sunday, May 19, 2013

Pad Woon Sen with Shallots and Asparagus


My first introduction to Thai cuisine was with Pad Woon Sen in the Summer of 1998. I remember the time period because it was something that would change my life. There have been extended periods of time where I ate Thai food for 3 nights a week, or more. Every Thai restaurant that you come across is going to have their version of Pad See Ew. Which is a great introduction to Thai cooking and a delicious dish. Pad Woon Sen, on the other hand, is a little bit harder to find and in my mind which makes it more satisfying when you do. I was excited to make the dish with the Shallot and Asparagus inspiration. I did it a few weeks ago now. The difficult part was trying to come up with an introduction to Pad Woon Sen. Is there a way to make Thai cuisine interesting, or better yet entertaining? Pad Woon Sin? As in: it's sinfully good. I struggled with it. I asked around. I found that there's an even quicker way to end a conversation with a person than telling them you have a blog about asparagus. Ask them about how to write a funny narrative about asparagus in Pad Woon Sen. I just got looks of confusion that turned to irritability from most people. One person even told me that they were tired of listening to my asparagus musings and posed the ultimatum that it was either him or the asparagus. I think we all know how that turned out. So now I present to you Pad Woon Sen with Shallots and Asparagus!


 Ingredients:

1 bunch of bok choy
1/2 bunch of asparagus
1 large shallot
1 red bell pepper
1 lb of chicken
6-8 green onions
pepper
4 table spoons of fish sauce
cooking oil
2 eggs
chicken broth
mung bean noodles (glass noodles or bean threads)


Intructions:

I personally prefer to have everything chopped and ready when I'm cooking so when the time comes I'm not frantically trying to prep ingredients as they need to go into the pan. The French call this mise en place or "putting in place". Soak your noodles in cold water for at least 10 minutes before cooking. Cut them in half. It will make them easier to negotiate as you're stirring other ingredients in. Heat a large pan, or better yet if you have one, a Wok with cooking oil on medium to medium high heat. It's recommended to marinade your chicken in the fish sauce, but I didn't do that. Add your chicken to the hot pan. This is a quick dish that can get away from you if aren't mindful. When the chicken is cooked add in your mung bean noodles. When the noodles are clear that means they're done. As both the chicken and the noodles are getting to look like the picture below, you should begin to integrate your vegetables and eggs in. The shallots, asparagus, and bell pepper should go in first. Those will take longer to cook than the green onions or the bok choy. Use the chicken broth to keep everything moist. The fish sauce acts as the salt for this dish so add to taste. Generally it's about 4 tablespoons. When it looks beautiful, it's ready to eat. Enjoy!


Tuesday, April 23, 2013

Roasted Paprika Shallots and Asparagus with Red Potatoes, Carrots, and Broccoli


While going through my asparagus archive I noticed that I have two separate photo shoots for what was essentially the same shallot and asparagus recipe. It's a great recipe that's easy and versatile so that would make sense why I have so many pictures of it. While I attempted to narrow down my favorites I came to find that this was no easy task. So rather than giving myself more work, and subsequently never getting around to make this post, I decided to just post them all. This is going to be a longer post than usual, filled with a lot of beautiful pictures and it has a great shallot and asparagus recipe. Since both photo shoots involved steak dinners, rather than going over how to grill a steak again I am instead going to go over acceptable or appropriate garnishes to go on steak. I would be upset to think my blog could be getting redundant.


Steak topped with Chimichurri 


Shallot and Asparagus Recipe:

What I like about this recipe is it's basically all you need to make. It could be its own meal if it needed to be. I've also included brussel sprouts along with the rest of the vegetables. They all roast for the same amount of time except for the broccoli. I like to have mine a little charred though so I wouldn't wait too long to add them to your mix.

Ingredients:
1 bunch of asparagus
2 reasonably sized shallots
1-3 carrots
2 crowns of broccoli
3-4 red potatoes
Olive oil
Salt, Pepper (to taste)
Paprika 


Instructions:

Preheat your oven to 450 degrees with your roasting pan inside. Wash and cut the ends off your asparagus. Peel your shallots. Chop your carrots. Quarter your potatoes. Add them to a large bowl. Add your salt, pepper, olive oil, and paprika. Mix them all together.  When your oven and pan are hot pour out the contents of the bowl into the hot pan and evenly distribute throughout. Cook for about 20 minutes. While that's cooking chop the flowers off of the crown of your broccoli and add them to the same bowl. Add some olive oil to those and more salt, pepper, and paprika. Check to see how far along your other roasting vegetables are. You want to pour the broccoli on top of the rest of them but make sure your broccoli has enough time too cook without over cooking your other vegetables. When they're all the desired texture remove pan from oven. Let them stand for 5 or so minutes, and then enjoy!


Appropriate Condiments for Steaks:

Argentina which is widely renowned for their beef and wine consumption, which for any respectable person are admirable traits. There's a condiment that you can find at most any restaurant. It's generally for steak but I've seen it used for dinner rolls. I've even heard it referred to as "Argentina's Ketchup". It's called Chimichurri. And with anything that is as wide spread through a region as chimichurri is through Argentina you can imagine that opinions on the correct way to make it are even more ubiquitous than the condiment. Ubiquitous²?


Ingredients:

1 bunch of parsley
5 cloves of garlic
3/4 cup of olive oil
1/4 cup of red wine vinegar
Red pepper flakes (to taste)
Pepper/Salt (to taste)
Juice from 1 lemon wedge

Instructions: 

Add contents into food processor. Process. It comes out tasting better if you let it chill in your refrigerator for at least an hour before serving.


This next garnish is a piece of guanciale that I roasted on the top of the steak. Guanciale is made from the pigs jowl or cheek and is similar to bacon but richer in flavor and fat. As it was finishing on the grill I added the guanciale to the top of it and I finished it off in a hot oven at 425 degrees. This is my version of the bacon wrapped filet mignon.


 The white sauce on the plate is 50% crème fraîche and 50% horse radish. Mixed together in a bowl and served cold. It can add a nice tangy flavor to your steak. 


Thursday, April 4, 2013

"Better than a Cobb" Shallot and Asparagus Steak Salad


I started to get a lot of hits off of the term, "Asparagus Salad". I should qualify that statement. I started to get a lot of hits for an asparagus blog off the term Asparagus Salad. If you Yahoo! search Asparagus Salad my asparagus salad comes up in the pictures. My blog isn't mentioned. It's just the picture. It's a great picture done by a lovely photographer that does a lot of pro bono work for me out of pity. I don't really know who even uses Yahoo! as a search engine. Does Alta Vista sometimes get too bogged down with traffic? Having seen that and wanting to respond to a vague sense of what my audience (I use this term really loosely) would want, I set out to make the best asparagus salad I could. This is what I came up with, and honestly I think it's better than a Cobb.

Here's the long name:

Steak salad with blanched asparagus, grilled shallots, avocado, cherry tomato, crumbled blue cheese, and a fried egg.

Or for short: S.S.B.A.G.S.A.C.T.C.B.C.F.E. (This is how you will affectionately order it at Chili's when they buy the recipe from me)


Ingredients:

Mixed greens
1 grilled shallot
Crumbled blue cheese
1/2 of an avocado
Cherry tomatoes
Grilled steak
1/3 cup olive oil
3 tablespoons of Grey Poupon
Red wine vinegar to taste
Salt
Pepper
1 fried egg per serving

Instructions:

I've previously talked about blanching asparagus, and I more recently talked about grilling steak. For the salad dressing in this all you need to do is put 1/3 of a cup of olive oil in a small bowl. Add your mustard and your red wine vinegar. Whisk it all until the mustard makes it emulsify. Add salt, pepper, and additional oil, mustard, or vinegar to taste. It's a fickle process and you're going to have to do taste tests until it's to your liking. I had most of my salad assembled as I was grilling my steak. When I say assembled what I mean is I just took the ingredients and I put them on a plate. What's nice about this recipe is that timing isn't a factor. A lot of the stressful element of cooking is derived from trying to cook several different things that cook at different rates and having them all ready at the same time. Friend, this is a salad. There's no need for any of that. When the steak is done let it rest and cool. I had everything sliced, chopped and plated and then I just fried an egg with ease for the final garnish. It made a hearty dinner that was easy and delicious.


Wednesday, March 20, 2013

Broiled Parmesan Shallots and Asparagus with Grilled Steak

Remember that time you went out to eat and you thought to yourself, "That was good, but there was just too much cheese?" Neither can I. You should keep that in mind when you're performing the tedious task of cheese grating. This is another broiled asparagus recipe that will take about 8 minutes so when you put the asparagus and shallots into the broiler you should be grating cheese for at least half of the amount of time that the asparagus is under the heat. Unless you're slow at grating cheese. Then you should be grating for the full amount of time. I don't like to give strict measurements on cheese but in my experience the more you have the less likely you are to be disappointed that there's not enough. It's math.


Grilling Steak:
It was brought to my attention earlier today that grilling a steak isn't just common knowledge passed from one generation to another that can be taken for granted. I was at a butcher shop with a man that confessed that he wasn't that good at grilling. He said that he considered "taking a class on it". I thought it was the most effeminate thing that I had ever heard from a man before. I always knew it was a fickle art form but it's nothing like trying to teach your rebellious child appreciation for abstract expressionism. So this is how you're supposed to grill a steak:

1. Lay your steak(s) out so they reach room temperature.
2. Heat your grill (high medium heat) so they're going onto a hot grill and they're searing when they touch.
3. Leave it on the first side for 7-9 minutes. (This varies depending on the thickness)
4. Flip once. Only once. When you keep turning it over it dries it out.
5. Let it cook until it's just a little too pink for your taste.
6. Let it rest for at least 5 minutes before you serve it.

If you under-cook your steak just a bit then as you're letting it rest your steak is going to cook itself to your desired outcome. If you cook it on the grill to the place you want it done to, then as your steak is sitting it's going to over-cook itself and you will end up with a slightly over-cooked steak.


Now that that's settled we can move on to the important part: shallots and asparagus!

Ingredients:
1/2 bundle of asparagus
1 1/2 shallot
Olive oil
Salt
Pepper
Parmesan Cheese (To Taste)


Instructions:
Cut (or snap) the coarse ends off the asparagus. Place them in a pan that's broiler safe. Cast iron or a cookie sheet that has aluminum foil across the top. Add your salt, pepper and drizzle olive oil over them all evenly. Put them in the broiler on high for 7-8 minutes. Grate your cheese while this is happening. After they're blackened and almost done pour your grated Parmesan across the top and put back into the broiler for an additional minute. Serve immediately. Enjoy.


I have two post scripts to add to this post:

1. I assume children don't care for abstract expressionism for two reasons. 1. Most people don't seem to. 2. They always seem to be concerned with coloring inside of lines. Which is counter intuitive to the abstract expressionist.

2. When I made this recipe the person I cook for ate all of her asparagus before she ate all of her steak. As you can imagine she's tired of asparagus. I took this as a compliment.